A gel polish manicure looks neatest when you match the polish, base, top coat, and lamp as one system. The strongest professional options are OPI GelColor, Gelish Soak-Off Gel Polish, and CND Shellac. For a bright white set, compare OPI Alpine Snow, Gelish Arctic Freeze, and CND Cream Puff.
Use thin layers, cure every coat fully, and remove only soak-off products with acetone. That combination prevents flooding, streaks, lifting, and unnecessary nail damage.
Best Gel Nail Polish Systems: OPI GelColor, Gelish, and CND Shellac Compared
These nail polish brands work best when you use their compatible base, color, top coat, and recommended lamp rather than mixing formulas casually.
OPI GelColor: This system uses a base coat, color coats, and top coat with a relatively medium, self-leveling texture. It gives you controlled application without feeling overly runny. Cure each layer in the specified OPI LED or UV cycle. For removal, file away the shine, wrap the nail with acetone, and wait for the color to loosen.
Gelish Soak-Off Gel Polish: Gelish uses Foundation, color, and Top It Off products. Its texture is fluid and easy to spread in thin layers, although you must keep it away from the cuticle. Follow the Gelish lamp cycle for each coat. After you break the topcoat seal, acetone wraps usually soften the product for gentle removal.
CND Shellac: Shellac has a thin, polish-like texture and a dedicated base, color, and top-coat workflow. It suits you if you prefer a lightweight feel and fast, consistent curing in the CND lamp. CND removal uses remover and wraps; the product commonly releases in about 10 minutes once the surface seal is filed.
Choose one complete system for predictable curing and removal. Regardless of texture, a thick coat can remain soft underneath even when its surface looks hard.
White Nail Polish Shades: Alpine Snow, Arctic Freeze, and Cream Puff
White gel color exposes brush marks more than darker shades, so coverage depends on both opacity and application pressure. These three options can all create a crisp manicure with two thin color coats.
- OPI Alpine Snow: A bright, dense white with strong coverage. It can look streaky if you press down or overwork the brush, so float the color across the nail and cure promptly.
- Gelish Arctic Freeze: A clean, cool white that generally reaches full opacity in two thin coats. Reload the brush for each nail instead of stretching a drying layer, which helps prevent transparent bands.
- CND Cream Puff: An opaque, slightly creamy white that gives a classic salon finish. Apply especially even coats because visible brush lines can remain if the layer is too thin in some areas and thick in others.
For any white nail polish, use a third ultra-thin coat only when the first two leave visible gaps. Thick white layers cure poorly and increase the risk of wrinkling.
Gel Polish Manicure Application: Prep, Thin Coats, Curing, and Top Coat
Work on clean, dry nails, and keep every product off your skin. Use this sequence:
- Prepare: Shape the free edge, gently push back the cuticle, and remove only loose nonliving tissue. Lightly buff away surface shine, then cleanse dust and oil with the system’s recommended cleanser. Do not apply hand cream first.
- Apply base: Brush on a very thin base coat, leaving a narrow margin around the skin. Cap the free edge without flooding it. Cure for the product’s lamp cycle; some bases use shorter cycles than color coats.
- Apply the first color coat: Use a thin layer from cuticle area toward the tip. Keep the brush almost flat over white polish, and avoid scrubbing the nail. Cure immediately, usually for the color’s specified 30- to 60-second LED cycle.
- Apply the second color coat: Repeat with even pressure, covering any transparent areas without piling product near the cuticle. Cure fully before touching the surface.
- Apply top coat: Add a thin, even layer and cap the edge. Cure for the top coat’s stated time. A complete cure leaves the surface smooth, glossy, and firm rather than dentable.
- Inspect: Check the sidewalls and cuticle line before finishing. If polish touches skin, remove it before curing. Wipe only a top coat that specifically requires wiping; leave no-wipe formulas untouched.
How to Remove a Gel Manicure: Complete Soak-Off Steps
To remove gel manicure color safely, confirm that the product is soak-off gel polish. Hard gel does not dissolve through this process. Never treat peeling or forceful scraping as normal removal.
- Break the seal: Gently file the glossy topcoat from each nail until the surface looks uniformly dull. Stop when the shine disappears; avoid filing into the natural nail.
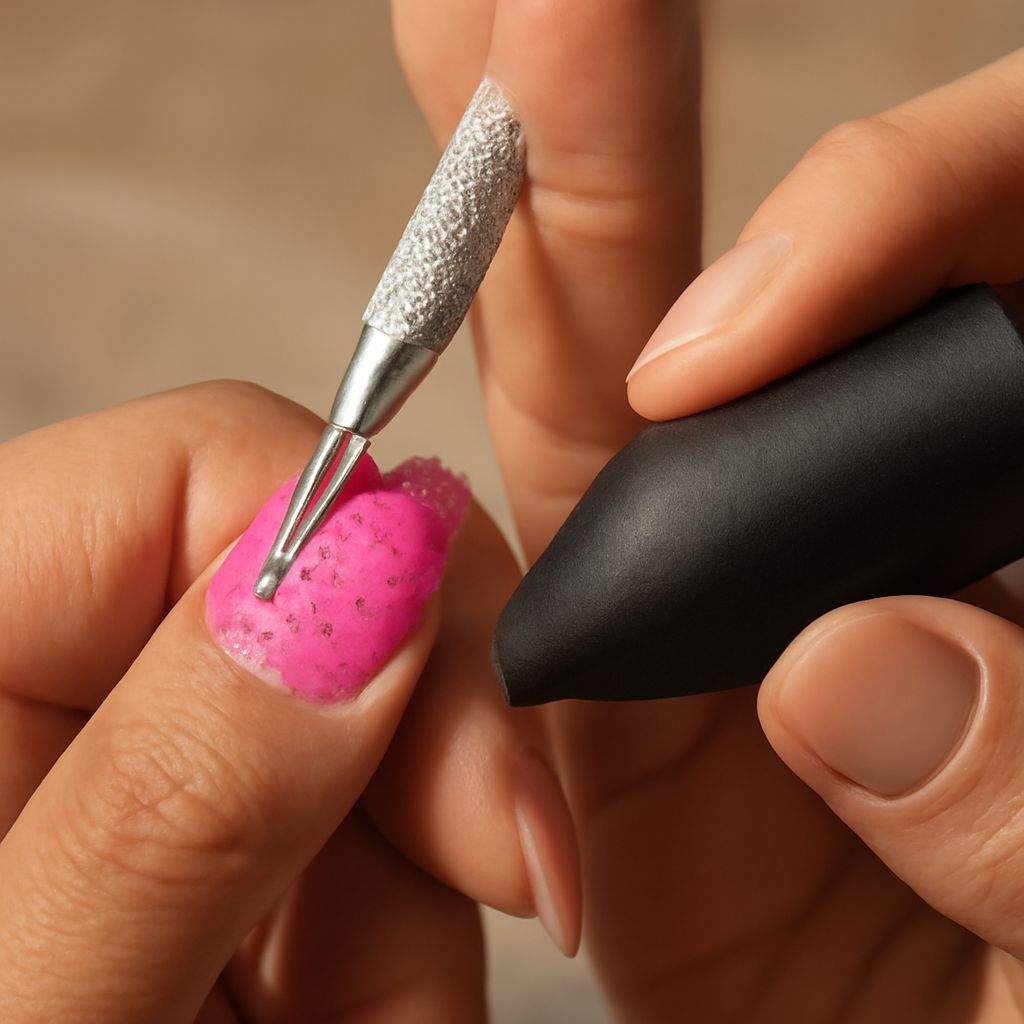
- Prepare acetone wraps: Soak small cotton pieces in pure acetone. Place one over each nail and secure it tightly with foil or purpose-made remover wraps.
- Wait 10 to 15 minutes: Keep the wraps in place and check one nail. Warmth can improve comfort, but do not use an open flame or aggressively heat acetone.
- Test the product: Properly softened gel looks lifted, wrinkled, crumbly, or flaky at the edges. A smooth, hard, glossy patch means it needs more soaking.
- Slide, never pry: Remove one wrap at a time and gently push softened product toward the tip with a wooden stick or manicure tool. If it resists, rewrap that nail for another five to 10 minutes instead of scraping.
- Finish care: Once the color releases completely, wash and dry your hands. Lightly smooth a remaining film if necessary, then apply cuticle oil and hand cream.