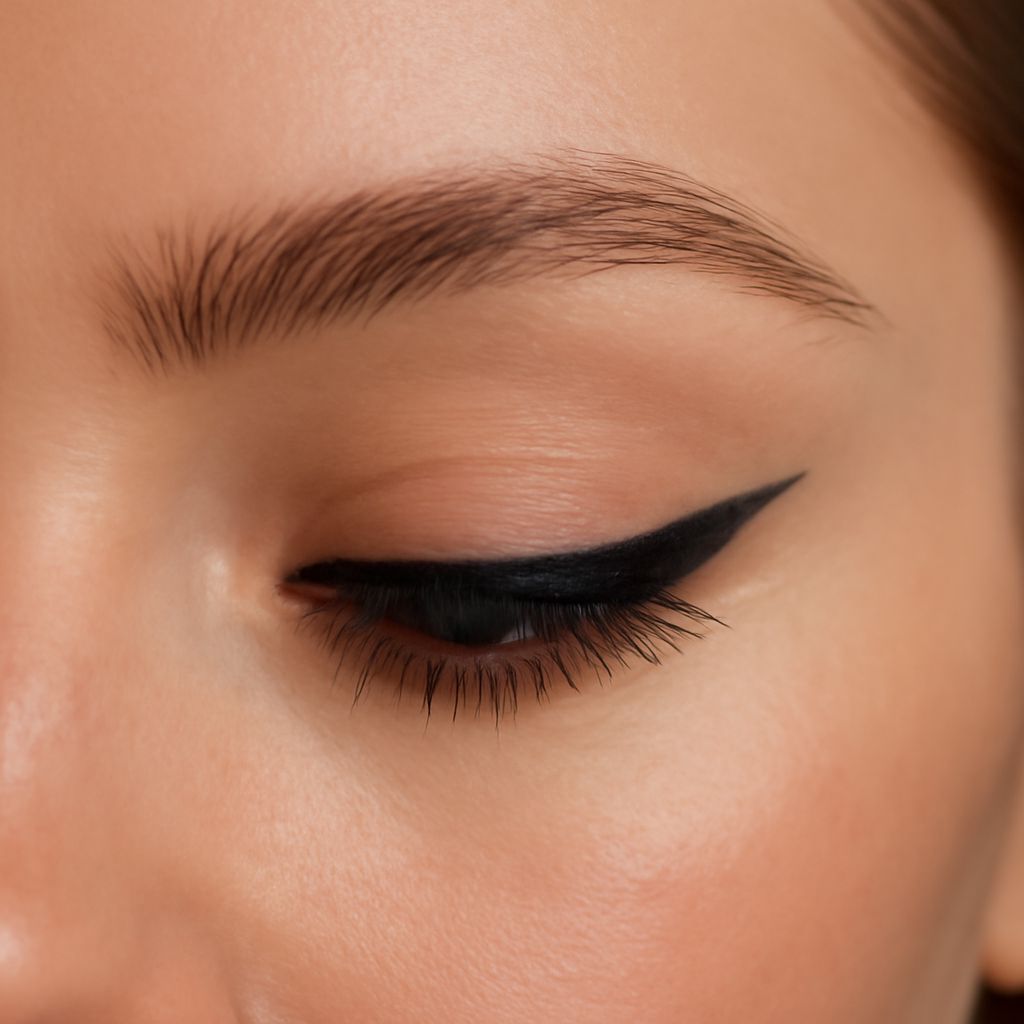
To learn how to apply winged eyeliner, focus on placement before pigment. A clean 1960s wing follows your eye’s natural direction, then extends slightly upward for lift.
You need a black or deep-brown pencil for mapping, liquid or gel liner for definition, a small angled brush, cotton swabs, and concealer. Work one eye at a time, but compare both wings before the liner sets.
Prepare the Lid and Choose a Wing Shape
Start with clean, dry eyelids. Apply a thin layer of eyeshadow primer, then set it lightly with translucent powder. This prevents the liner from skipping or transferring onto the crease.
Look straight ahead with your eyes relaxed. Imagine a line from the outer corner toward the end of your eyebrow. Your wing should generally follow that direction, but adjust the angle for your eye shape:
- Hooded eyes: Keep the wing short and slightly higher than the outer crease so it remains visible when your eyes are open.
- Downturned eyes: Begin the wing at the outer corner, then angle it upward rather than following the lower lash line downward.
- Round eyes: Extend the wing outward for balance, keeping the inner and center liner relatively slim.
- Deep-set or almond eyes: Use a moderate upward angle and build thickness gradually at the outer third.
How to Apply Winged Eyeliner: Map, Draw, and Connect
- Mark the endpoint. Place a tiny pencil dot where you want the wing to finish. Keep it close to the natural brow-tail direction for a wearable result.
- Mark the base. Add a second dot just above the outer lash line, about one-quarter of the way inward. This controls the wing’s thickness.
- Draw the lower edge. Connect the outer-corner area to the endpoint with a short, straight stroke. Use several small strokes instead of one long sweep.
- Draw the upper edge. Connect the endpoint to the base dot, creating a narrow triangle. Keep this edge smooth and slightly curved if your eyelid is rounded.
- Fill and extend. Fill the triangle, then trace the liner across the upper lashes from the inner corner outward. Keep the inner line thin and thicken it toward the wing.
- Check with open eyes. If the wing disappears when you relax your lid, raise the endpoint or add thickness above the crease rather than piling product at the lash line.
Pause for 30 seconds, then compare both wings from several angles. Matching direction matters more than identical thickness.
How to Do an Eyeliner Wing: Correct and Refine
Fix small mistakes before the liner fully dries. Use a pointed cotton swab with micellar water to erase stray pigment, then pat the area dry. For a sharper edge, apply a narrow line of concealer beneath the wing with a small flat brush.
If one wing looks lower, do not immediately enlarge the other. Raise the lower-looking edge with concealer, then redraw only the missing section. If the liner appears uneven along the lashes, press a dark pencil between the lashes and soften the line with a brush.
For smudging, remove the oily residue completely before applying fresh liner. A crisp wing has a pointed tip, an unbroken upper edge, and no visible gap above the lashes.
Add Sixties Makeup Details That Support the Wing
Keep the supporting details graphic but wearable. Sweep a matte taupe or soft brown shadow through the crease, extending it slightly beyond the outer corner. Blend upward without covering the wing’s clean edge.
Apply mascara generously to the upper lashes, concentrating on the outer half. Add individual or half-strip lashes if you want stronger lift. For a distinctly sixties makeup effect, define the lower lashes with mascara and add a few deliberate lower-lash strokes using a fine brush or brown liner.
Finish with a pale matte or satin shadow on the lid and inner corner. Keep the lower line lighter than the upper wing so the lifted shape remains the focus.