To create lasting hair volume and curls, prepare the roots before you reach for a hot tool. The right process combines clean, lightweight hair, root lift, a suitable barrel, controlled sections, and enough cooling time for the shape to set.
Your texture determines the best route. Velcro or foam rollers build gentle, extended lift with little heat, while a curling iron creates faster, more defined curls and greater control. Use the process below to match the tool and technique to your length, density, and hold needs.
Hair Volume Prep: Build Lift Before You Curl
Hair loses volume when oil, heavy conditioner, residue, or excess moisture weighs down the roots. Start with shampoo focused on the scalp, then apply conditioner from midlength to ends. Fine hair may need only a small amount of lightweight conditioner. Thick, coarse, or dry hair needs more softness, but keep rich products away from the root area.
Blot your hair with a towel instead of rubbing it, then apply a heat protectant through the lengths. If you need extra lift, add a lightweight mousse or root spray while your hair is damp. Blow-dry the roots upward or in the opposite direction of growth. Directing the airflow downward and pulling the hair flat can reduce lift.
- Dry your roots completely before curling. Damp sections will not hold a lasting shape.
- Use a round brush for polished lift, or rough-dry with your fingers for more texture.
- Separate the crown from the lower layers before styling so you can reach every section.
Let freshly dried hair cool for a few minutes before curling. Hair that still feels warm and flexible may stretch out when you begin wrapping it.
Using Volume Powder Without Buildup
Volume powder works best as a targeted root product, not an all-over styling dust. Apply it only after your hair is fully dry and before you curl. Lift a small section at the crown, place the nozzle or shaker near the roots, and use one or two light shakes. For loose powders, start with roughly a pea-sized amount distributed across several root sections.
Massage the powder into the roots with your fingertips, then wait a few seconds before adding more. You should feel slight grip and see lift, not a chalky coating. Use a little extra at the crown or part line if needed, but avoid coating the same area repeatedly. Too much powder can make hair dull, stiff, sticky, or difficult to rework.
- Choose powder for dry hair; applying it to damp roots can create uneven clumps.
- Keep it away from the midlengths and ends unless you specifically want a dry, tousled texture.
- Brush or shake out excess before adding hairspray.
If your hair feels gritty after styling, you used more product than the roots could absorb. Massage the area, then remove excess with a clean, dry brush. On the next attempt, use fewer shakes and distribute them across more sections.
Best Hair Curler: Curlers Versus Curling Irons
The best hair curler depends on whether you value low heat, speed, definition, or precise control. Passive curlers include Velcro rollers, foam rollers, and bendable rods. They shape hair while it cools or dries, so they can create soft volume with less direct heat. They usually take longer, and the result depends heavily on section size, tension, and how completely the hair dries.
Velcro rollers suit root lift and bouncy, brushed-out waves. Foam rollers and flexible rods work well for overnight styling because they feel lighter while you sleep. Passive tools generally create a softer, less uniform finish, but they can reduce heat exposure and support volume at the crown.
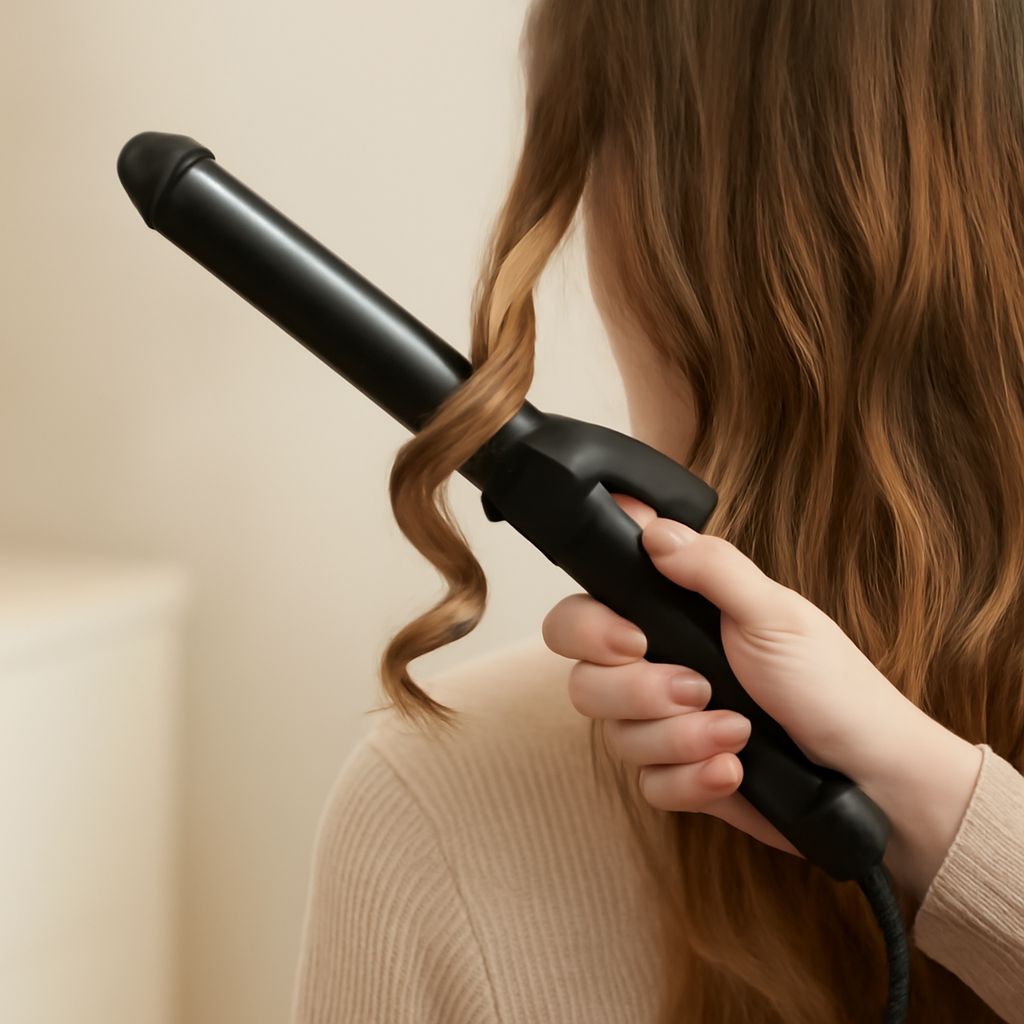
Heated curling irons and wands work faster and give you more control over curl direction, tightness, and placement. They suit defined curls, polished waves, and targeted root-to-end styling. The trade-off is heat exposure and the need to manage each section carefully.
- Choose passive curlers when you want gentle volume, a softer finish, or minimal direct heat.
- Choose a curling iron when you need speed, consistent curls, or control around the face and crown.
- Combine them by using rollers at the roots and an iron on selected lengths for efficient lift and definition.
Best Curling Iron for Long Hair: Barrel and Section Choices
For long hair, barrel length matters as much as barrel diameter. A longer barrel lets you wrap more hair without repeatedly moving the section, which can make styling faster and more even. The best curling iron for long hair should also have a comfortable grip, stable temperature control, and enough usable barrel space for your longest layers.
Choose diameter by the finish you want and how easily your hair holds shape. A smaller barrel creates tighter curls that relax into waves. A medium barrel creates flexible waves and defined curls. A larger barrel creates broad bends and soft volume, but it may not hold well in fine or very straight hair. Your length, texture, and desired amount of relaxation should guide the choice rather than a single universal size.
Work in sections that match your density. Fine or medium hair can often handle sections about one to two inches wide. Dense, long hair may need smaller sections so heat reaches the center of each bundle. Very small sections increase styling time, so use them only where the hair resists curl or where you need extra definition.
Wrap each section away from your face at the front, then alternate directions through the rest of the head for a fuller finish. Leave the last inch or two straighter for a modern wave, or wrap to the ends for a more complete curl.
Best Curling Iron for Thick Hair: Heat, Cooling, and Finishing
The best curling iron for thick hair needs adjustable heat, a barrel that holds temperature steadily, and enough space for controlled sections. Thick or coarse hair may require more heat than fine hair, but begin conservatively and increase only when a test curl falls flat. As a general starting point, fine or fragile hair may suit approximately 300–340°F, medium hair about 340–390°F, and coarse, resistant hair about 390–430°F. Stay within your tool’s guidance and lower the temperature for damaged or chemically treated hair.
- Protect and divide. Apply heat protectant, detangle gently, and divide dry hair into lower, middle, and crown layers.
- Test one section. Curl a hidden piece at a moderate setting. If the curl will not form after controlled exposure, raise the temperature slightly or reduce the section size.
- Wrap evenly. Keep the iron moving smoothly, without pressing the hair against the barrel repeatedly. Hold only as long as needed for the strand to take shape.
- Set the curl. Release the curl into your palm or clip it near the head while it cools. Do not brush or stretch warm curls; cooling locks in the temporary shape.
- Finish selectively. Once completely cool, shake out the roots with your fingers, then separate curls lightly. Add flexible hairspray from a distance rather than saturating the hair.
For thick hair, let each layer cool before blending it with the next. If curls collapse at the roots, apply a small amount of volume powder after the hair cools and massage it in. If the ends look dry or frizzy, use a tiny amount of smoothing serum only on the ends, keeping the root area light.